Setting Up BrightPay for Multiple Users
Each BrightPay licence allows for the software to be activated up to 5 times.
Multiple users of BrightPay should install the software to the local C drive of each user’s PC. At the time of setting up a new employer dataset, users then choose a location to store and access their payroll data files from. If shared access is required, then this data location can be a server/ network location or, should you wish, be set up within a cloud environment e.g Dropbox.
Installing BrightPay to each PC
To install BrightPay, simply select the ‘Download’ menu on the BrightPay website (www.brightpay.ie) and click on ‘Download/Upgrade’ option under 'Existing Customers' and click the 'Download' button.
1) If you are asked whether you would like to run or save the software, select ‘Run’ when prompted.
2) On the ‘Welcome to BrightPay Setup Wizard’, click ‘Next’ to continue.
3) Read the license agreement carefully and if happy to accept the terms tick the box provided. Then click ‘Next’.
4) On the next screen, you will be asked where you would like to install the software. The recommended default location for the installation will be displayed in the box. To install to this folder, simply click ‘Next’. Alternatively, if you wish to install the software to a different location of your choice, click the ‘Change’ button and browse to your destination folder.
Please note: the software is designed to be installed and run from the local C drive of each user’s PC.
5) Click ‘Next’ to continue.
6) You are now ready to begin the installation. Click ‘Install’ when ready.
7) As soon as the Setup Wizard has completed, simply click ‘Finish’.
8) BrightPay installs as a trial version, which can be used licence-free for 60 days. The software can be licensed at any time during or after the trial period.
The BrightPay icon should now be present on your Desktop in order to access the software.
9) In the event that an icon hasn’t been created on your Desktop, one can be created by browsing to your BrightPay installation folder and right clicking on the ‘BrightPay.exe’ file that can be found here. Selecting the option ‘Send to > Desktop (create shortcut)' will now place the BrightPay icon on the Desktop for you.
Creating and Accessing a Central Data Location
1) Choose one user to set up a new directory on your server/ network/ cloud environment into which the employer datasets are to be saved and accessed from. It is from this same location that other users will access the files once the employer datasets have been created.
2) Next, choose one PC to create the first employer dataset. On the 'Open Employer' screen, click 'Create New Employer' and follow the step-by-step instructions to set up the employer file. (For assistance with setting up a new employer, please click here). When prompted to save your employer data file, browse to the central directory that has been created in step 1 and save the dataset here. BrightPay will save the chosen central directory as the default file location.
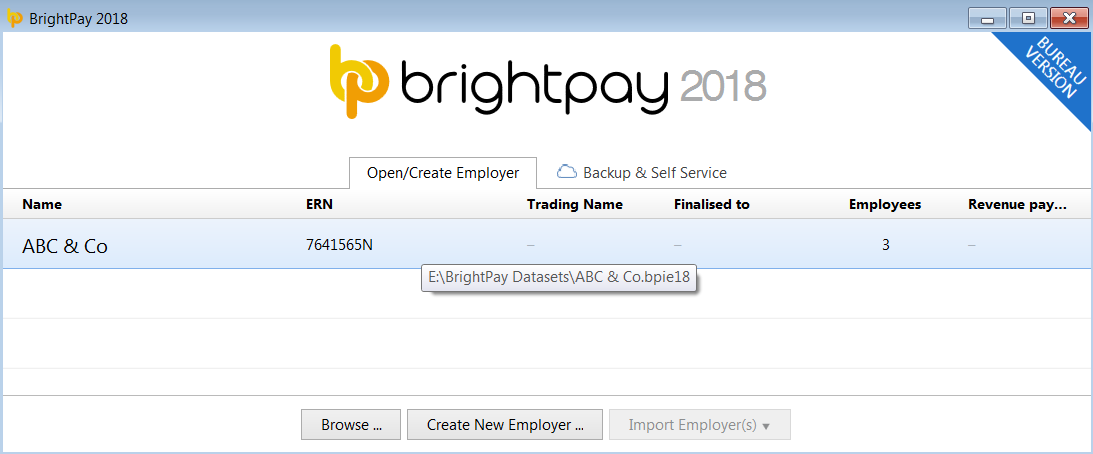
3) The PC which has created the dataset will now have this employer showing in their employer listing:
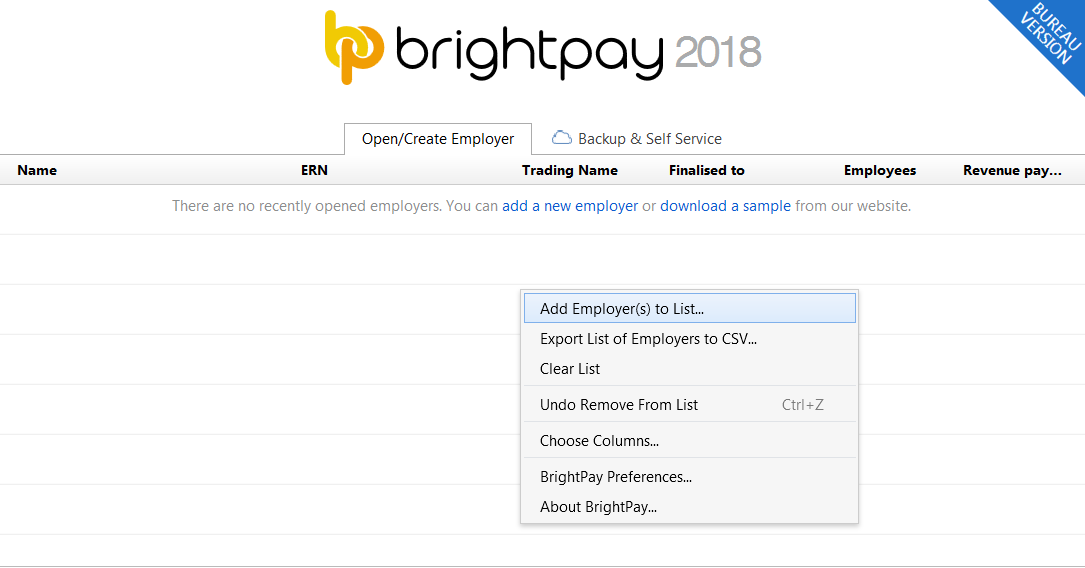
4) All other users will not see the same employer listing by default, as there is no history as yet on these PCs of this employer dataset.
To create the same employer listing on all other individual PCs, each user should:
- right click on their 'Open Employer' screen and choose 'Add Employer(s) to List':
Browse to the central directory and highlight the employer file you wish to add to your listing. Alternatively, if there is more than one employer file to add, highlight all relevant employer files by holding down the Ctrl key on your keyboard and left-click on each one in order to add them to your listing at the same time. When all relevant employer files have been selected, click 'Open' to add the employers to your listing.
5) The user will now have access to open any one of the employer files on their listing, once they know the password for the particular employer.
Please note: going forward, all newly-created employer datasets should be saved to the central directory and the steps above followed in order for all users to have shared access of them:
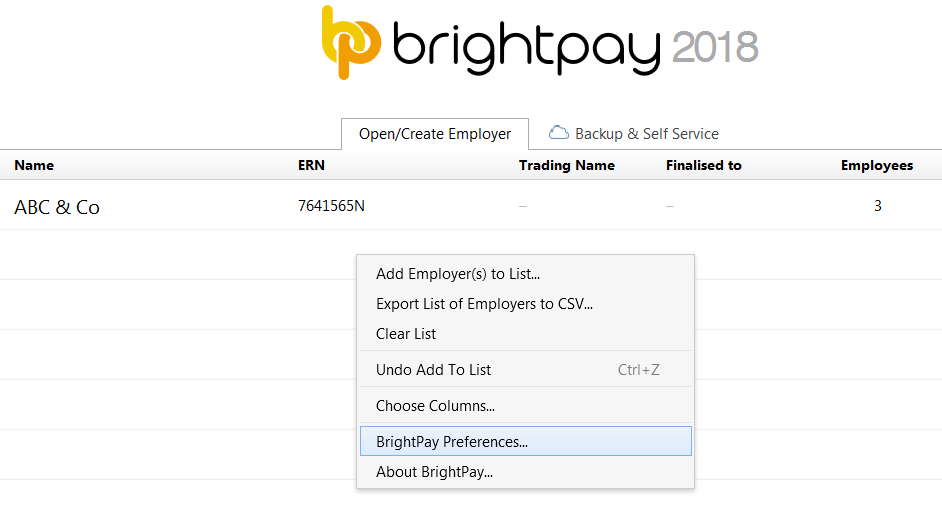
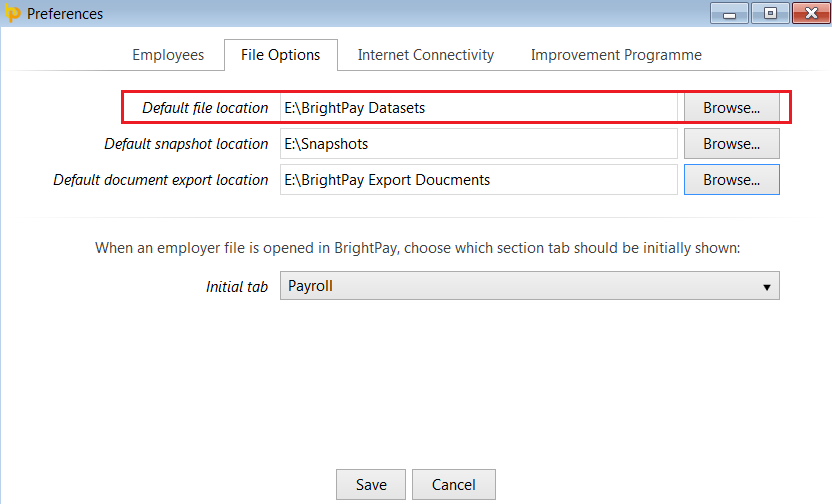
6) Each user should therefore ensure that their default file location is set to be the central directory within their individual 'Preferences' menu:
Need help? Support is available at 01 8352074 or [email protected].