Payroll Entry Requests - Bureau Guidance
A Payroll Entry Request allows a Bureau (admin user) to send a request to an Employer (standard user), requesting their client to log in to their Connect portal and enter payroll information for some or all of their employees. The payroll data entered by the Employer can subsequently be uploaded back into the Bureau's BrightPay software.
A Payroll Entry Request can be sent by a Bureau in two ways:
Sending a Payroll Entry Request through the Connect portal
- Log in to your Connect portal and click the option 'Requests' on the menu bar.
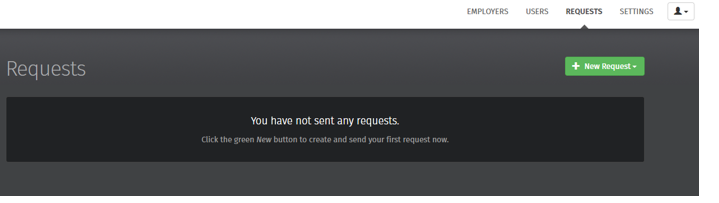
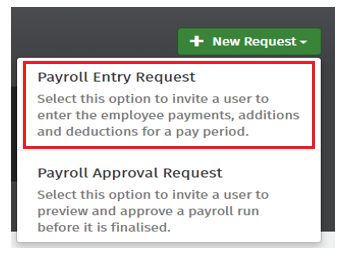
- The first time you use this option there will be no requests on this screen. To make a new request, click on 'New Request', followed by 'Payroll Entry Request:'
Sending a Payroll Entry Request through the BrightPay software
Within 'Payroll', simply click on the 'Requests' icon and choose New Payroll Entry Request:
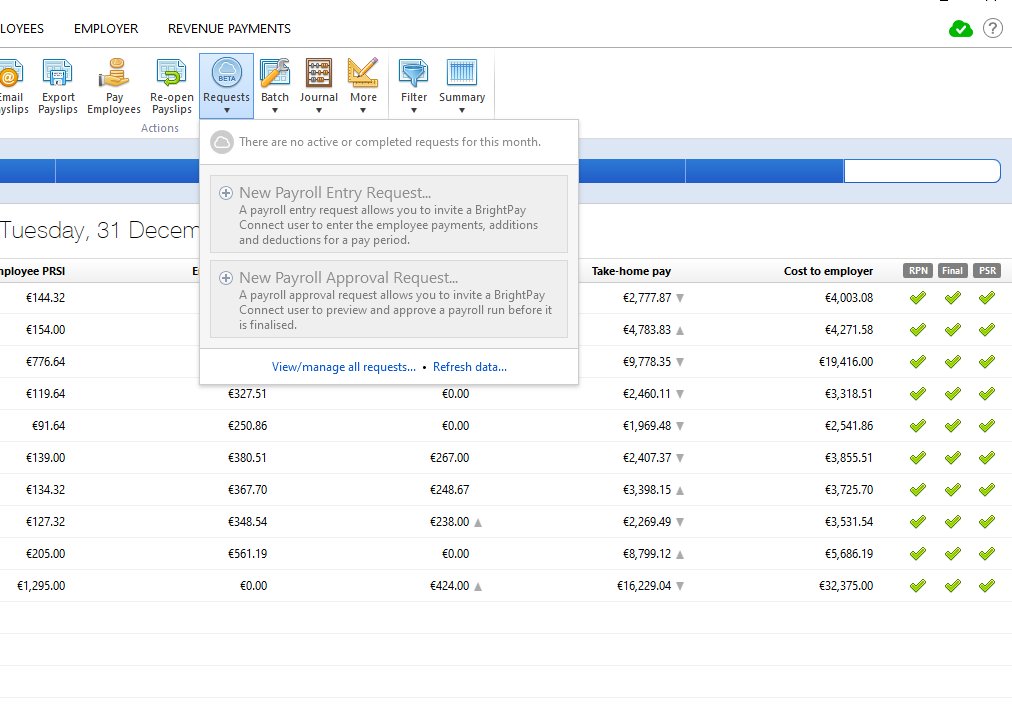
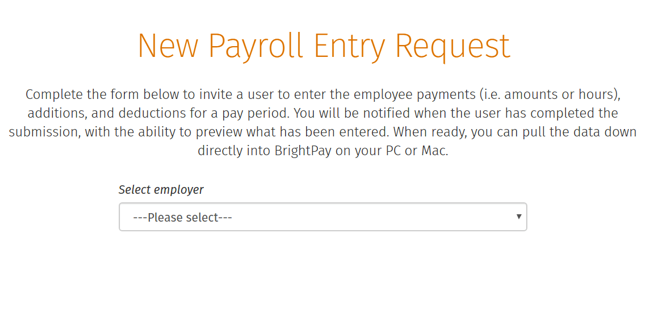
With both options above, the Bureau will then be given the option to choose which employer, which user, which period, and which employees (all or a subset of employees) they wish the Employer to enter employee pay information for. The Bureau can also send comments and notes on each request, if required
- Click 'Submit' when ready.
The payroll entry request will now be sent to the Employer. They will receive an email to notify them of the request, along with a notification on their Connect portal:
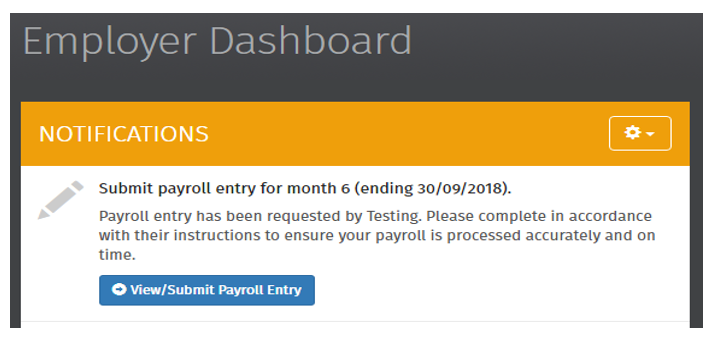
Once the Payroll Entry Request has been sent to the Employer, the outstanding request will then appear in the Bureau’s Connect portal under the heading 'Waiting for Response'.
The Employer's Process
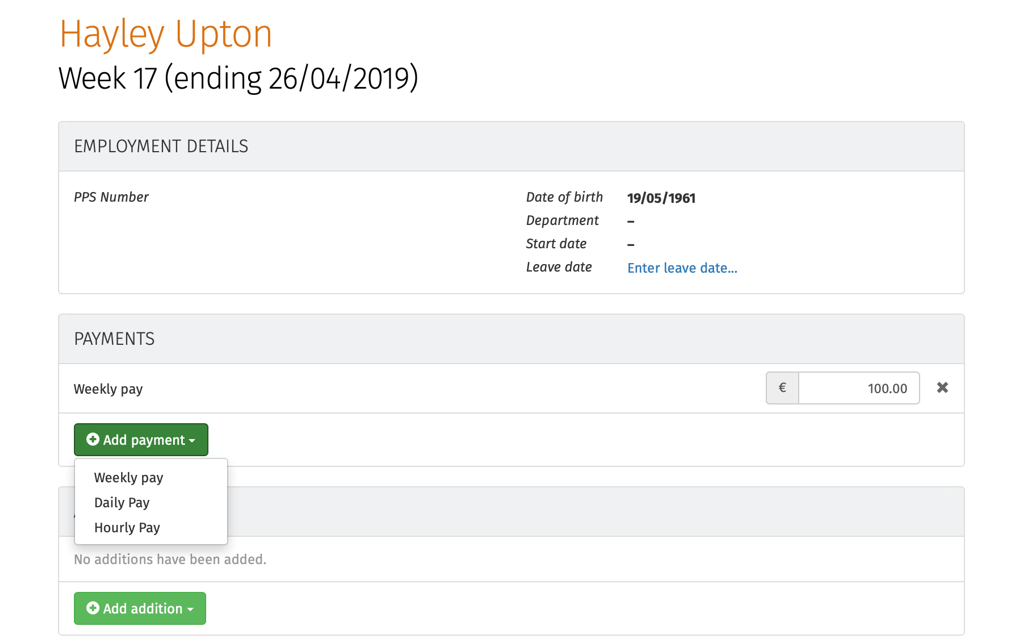
Once the Employer clicks on their 'View/Submit Payroll Entry' button, they will be brought to a screen where they can input the data for each employee. The default amounts will be copied from the previous period’s payroll, so they will only need to input data if there are changes.
The Employer has the option to click into each individual employee and enter their payments, additions and deductions etc. Each section has multiple options and amounts such as hourly rates, daily rates, basic pay can be added, changed or deleted.
Once all of the payroll data for an employee has been entered, they can be marked as complete. To do this, the Employer can scroll to the bottom of the page and click on the 'Mark as Complete and Save' button.
All employees that have been completed will be highlighted in green and are marked 'Completed'. Employees yet to be completed will be marked 'Awaiting payroll entry'. All employees need to be completed to finalise the payroll.
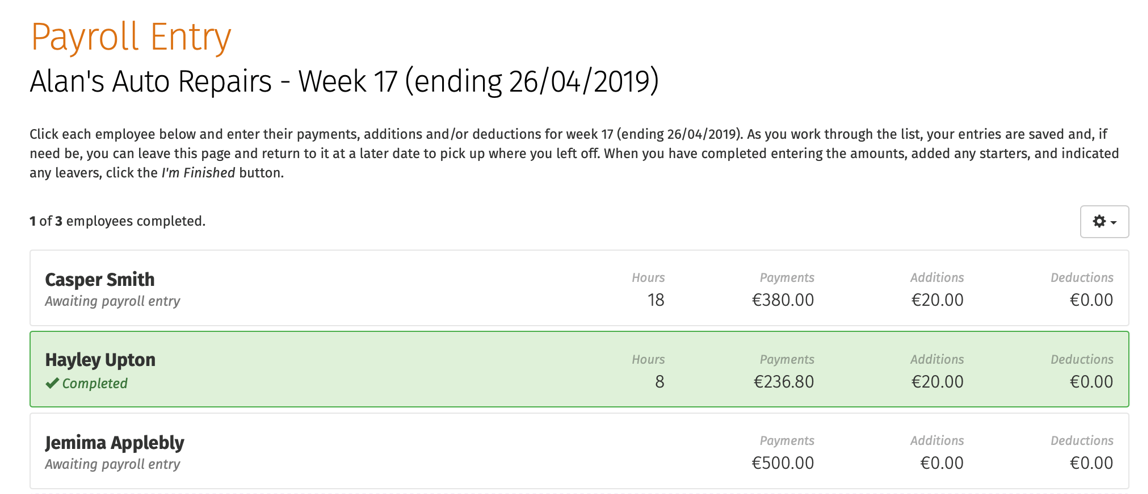
To mark a batch of employees as complete, the Employer can click on the gear icon at the top right and select 'Mark all as complete'. To reverse this they can 'Mark all as incomplete'.
The Employer also has the option to add a new employee to the payroll in Connect. To do so, the Employer simply clicks on the 'New starter this period' button:
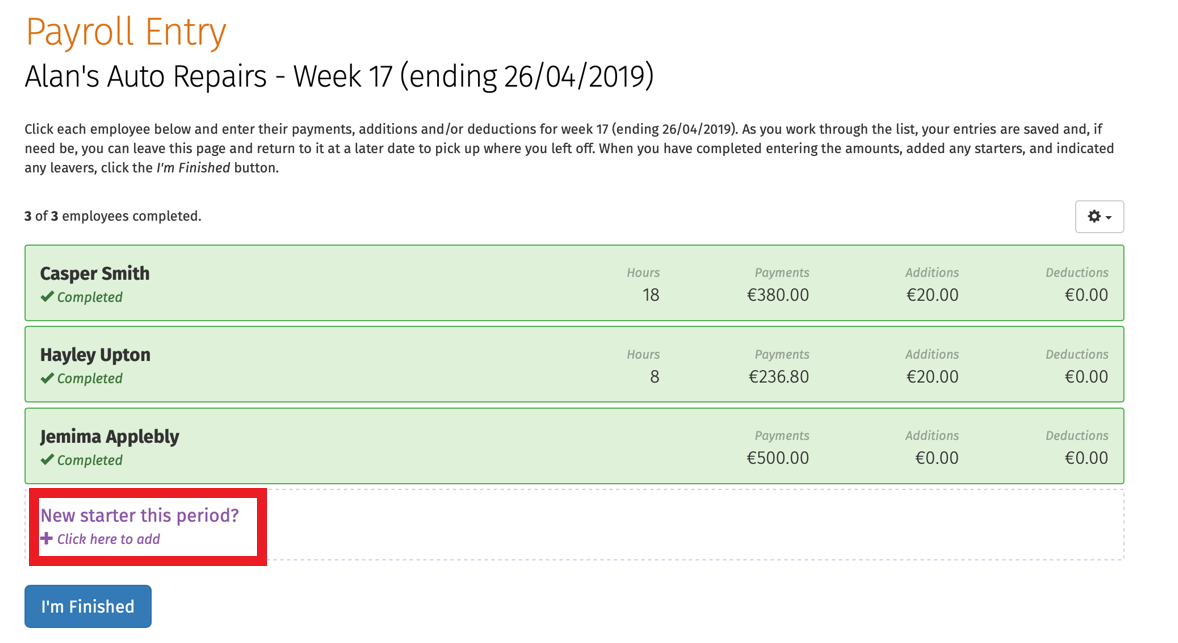
The Employer can input all of the new employee’s information directly to Connect, and once the payroll request is completed this information will automatically synchronise with the Bureau’s BrightPay software.
Once all of the payroll information is entered, the Employer can also include comments or notes before completing the request.
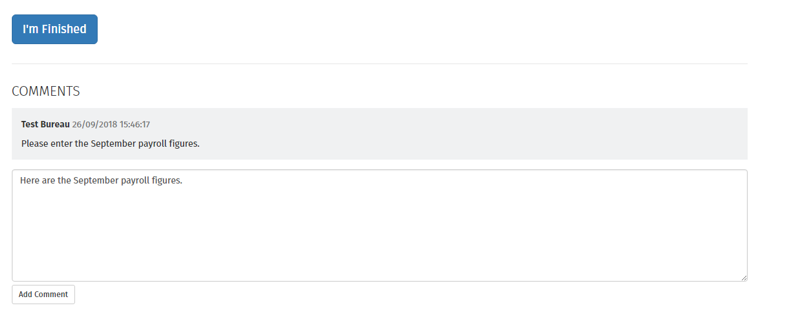
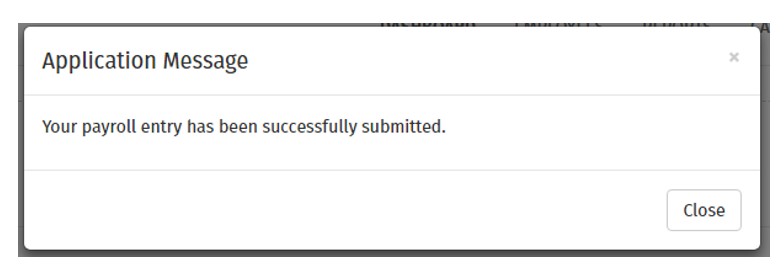
Once the Employer is finished and they click the 'I’m Finished' button, they will receive the following confirmation:
Once a Payroll Entry Request is submitted
When the payroll information is submitted by the Employer, the Bureau will then receive a notification on their Connect portal, along with an email to their registered email address to notify them. When the Bureau logs into their Connect portal, they will see a star beside the Requests button which lets them know they have received a new response to a request.
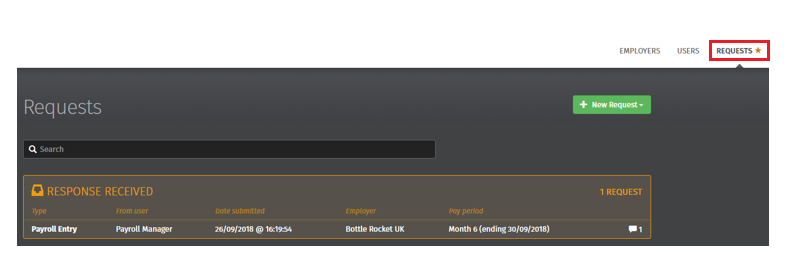
The Bureau can then click on the new response to view the payroll data submitted by the Employer.
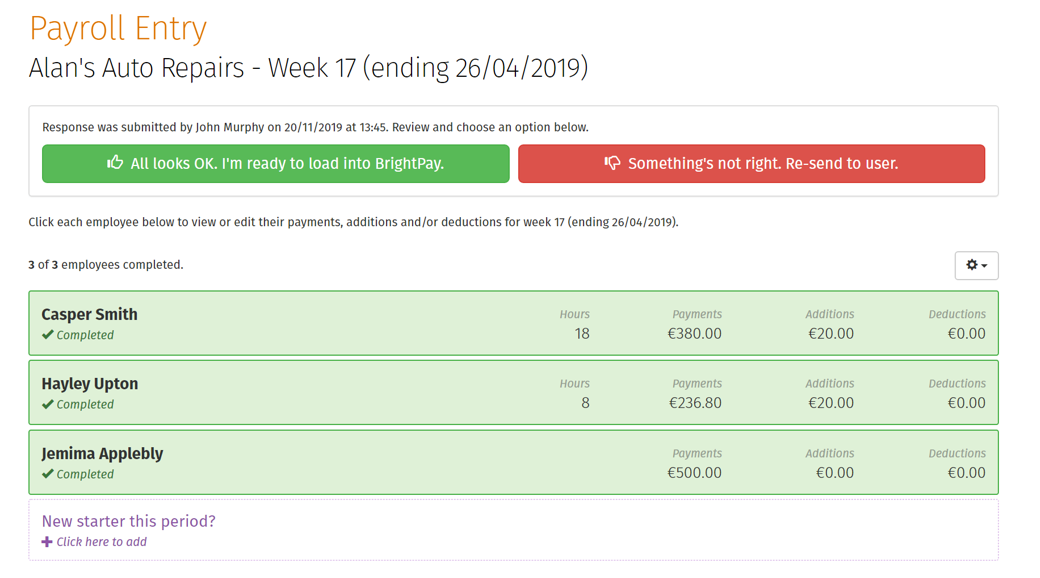
Once the Bureau have reviewed the information, they can either confirm it if they are happy that all is correct or decline it if something doesn’t look right. If declined, this will re-send the request back to the Employer (with comments if needed) and they can review and re-submit the payroll data again.
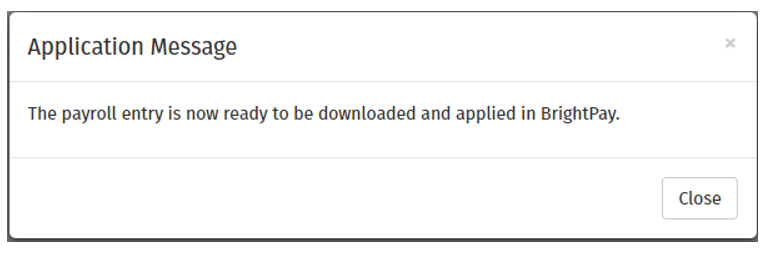
Once the information is correct, the Bureau can click on the green All looks OK button as shown above. A confirmation message will then appear asking if the Bureau is sure they wish to download the data into BrightPay. Click OK if happy to proceed.

The Bureau will then see a message confirming that the information is ready to be downloaded into BrightPay.
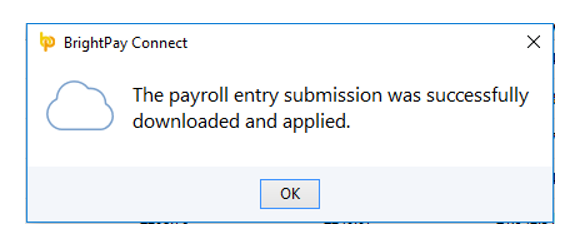
Once the Bureau opens the Employer file in their BrightPay software, the request will automatically be synced from Connect and a notification will appear allowing the Bureau to preview or download the payroll information from Connect into BrightPay.
Please note: any payroll data already processed in BrightPay will never be overwritten by Connect payroll data automatically - this will only occur when a Bureau clicks on the 'Download and apply' button. Once this is done, then the data in Connect will be replicated in the BrightPay software.

The Bureau will then receive a notification confirming that the download was successful and that the BrightPay data has been updated.
All that needs to be done by the Bureau now is to review the data one last time and if everything is correct, click 'Finalise Payslips' in BrightPay. Once finalised, this will automatically sync with Connect and the payslips will be made available to the Employer and Employees.
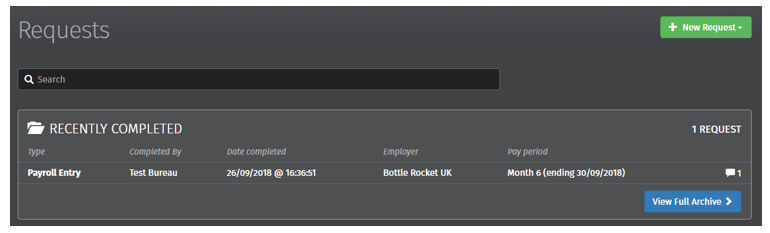
In the Bureau Connect portal, the response will automatically be marked complete.
The Employee will receive an email (and a notification on their phone or tablet if they have the app installed) that their new payslip is available.
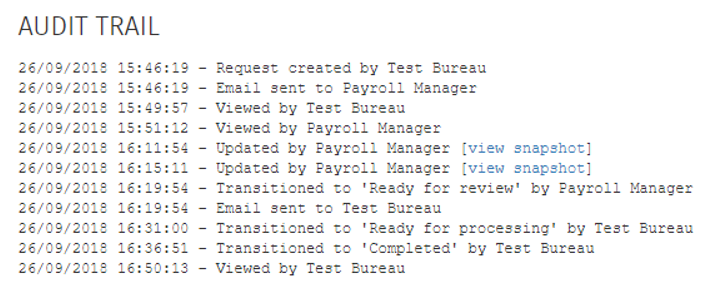
Audit trail
A useful feature for Bureaus in Connect is the Audit Trail. This can be found by scrolling to the bottom of the page on any payroll request. It’s automatically updated with each step of the payroll process, and cannot be changed or manipulated in any way, in turn eradicating any breakdown of communication between a Bureau and their client.
Need help? Support is available at 01 8352074 or [email protected].